
Despite the dozens of best management practices for erosion control available, straw wattles are one of the simplest and most versatile solutions.
Not only are straw wattles 100% biodegradable but they can be installed virtually anywhere you can think of and without the use of heavy machinery.
This guide will tell you everything you need to know about handling, installing, and maintaining straw wattles on an active work site.
How Do Straw Wattles Work?
Straw wattles are composed of fine mesh fibers, such as shaved wood, wheat, and rice grain, that are rolled into a tube using wire or twine.
These thick tubes go by several names–fiber rolls, straw worms, and bio-rolls–and are typically placed on slopes without a proper vegetative cover or that have lost over a quarter of their protective cover. Far from just impeding water flow over a steep incline, straw wattles help filter out fine sediment particles, absorb excess runoff, and even increase water infiltration of the surrounding soil.
There are many uses for straw wattles, from protecting storm drains to reinforcing rock stockpiles. While considered a short-term control, there is no reason that straw wattles can’t be a long-term solution for erosion control.
Benefits of Straw Wattles
Straw wattles offer several benefits for site owners regarding erosion control, and they may even offer some advantages over other, more costly BMPs.
Erosion Control
Straw wattles can impede, absorb, and slow down excess water runoff on slopes and protect native topsoil from extreme wind conditions. In turn, this can increase the speed of revitalizing soil after construction has ceased and protect against other potential dangers, such as flooding.
Sediment Control
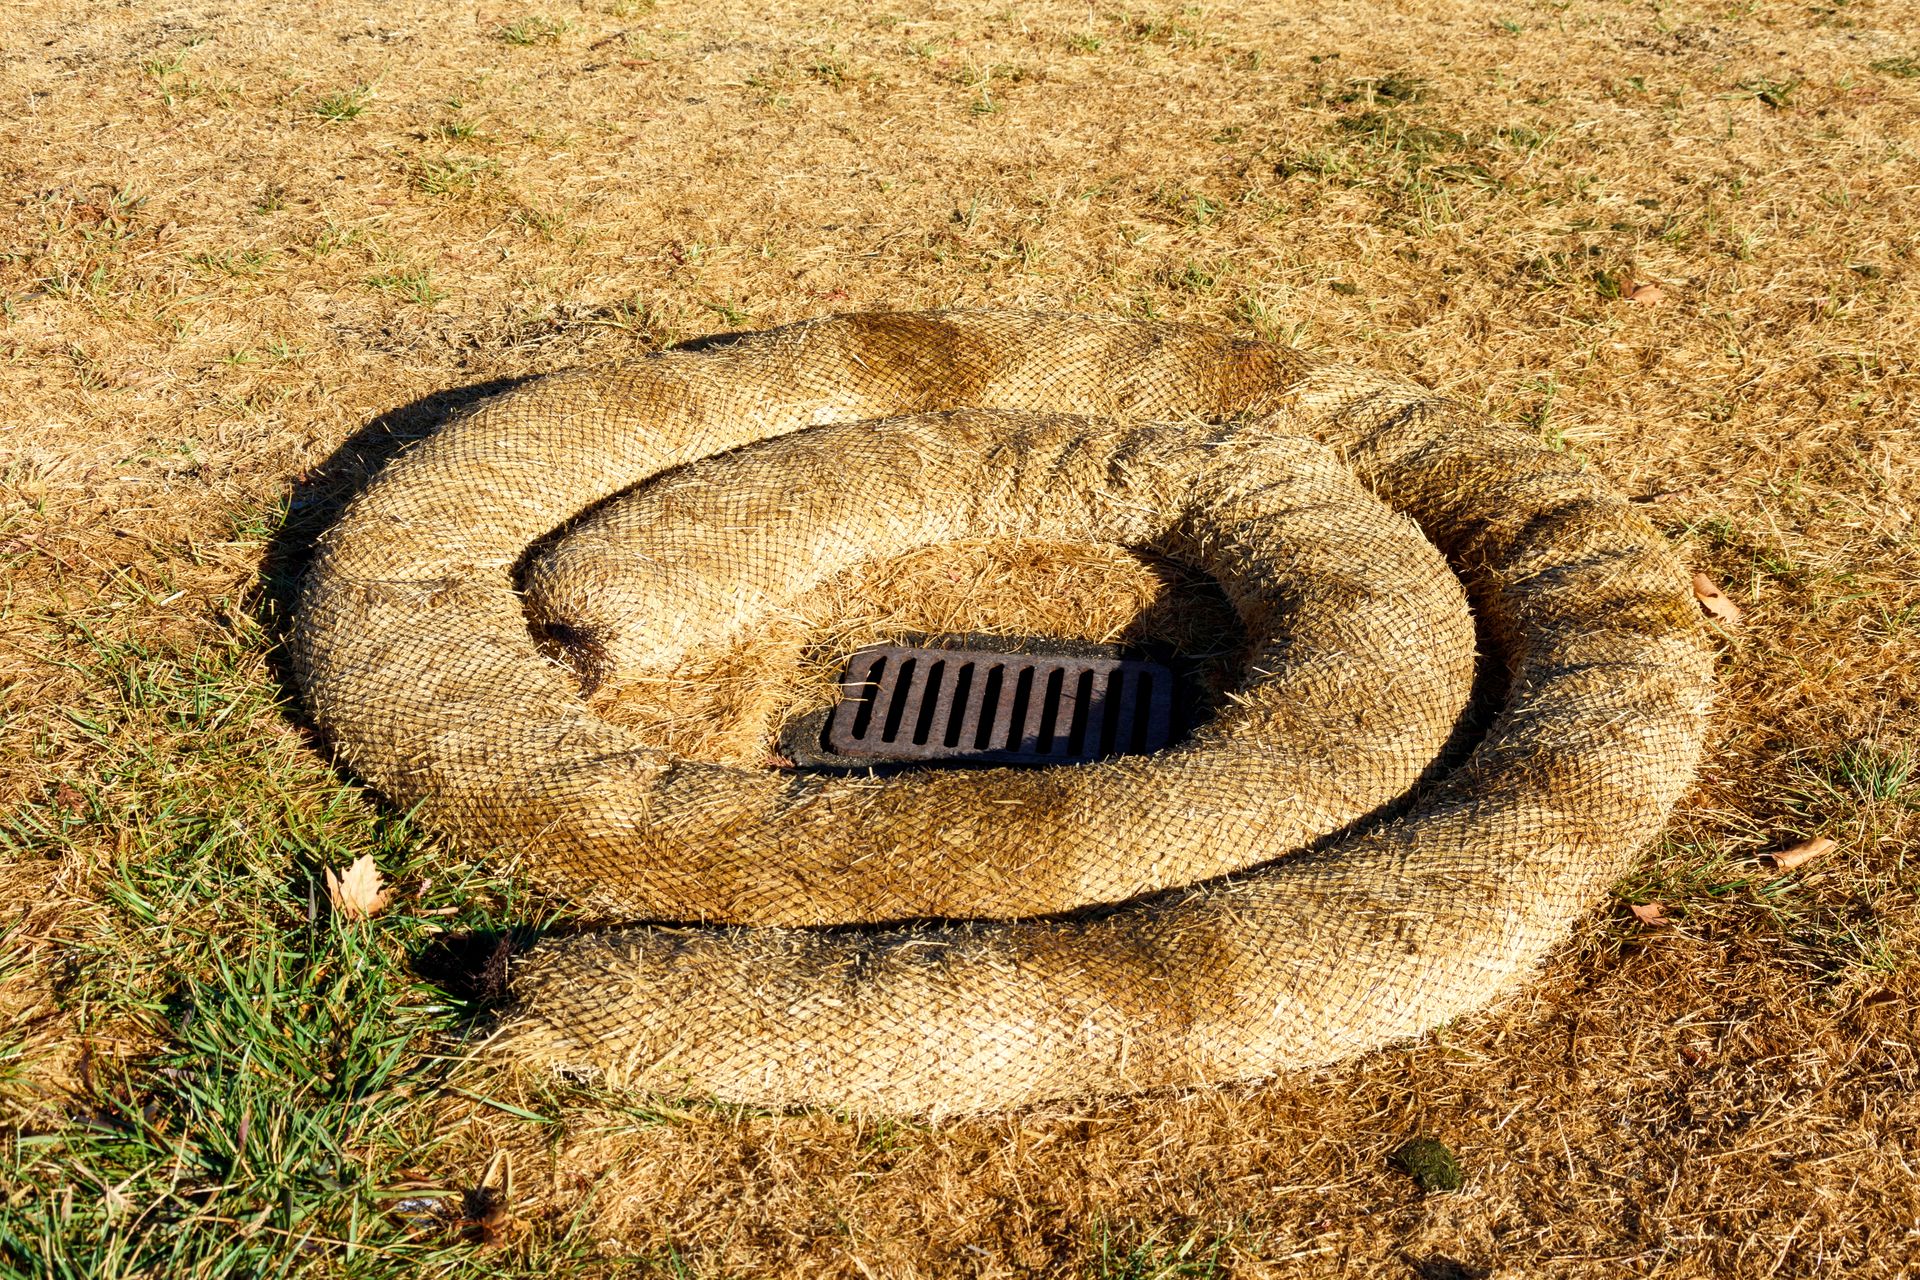
Straw wattles protect native topsoil, reducing the risk of sedimentation and filter out heavy sediment particles before being discharged into storm drains or vents. For this reason, straw wattles are also a popular control placed around discharging points–not just slopes.
Increased Infiltration
Erosion and excessive rainfall can diminish the soil’s ability to absorb water, leading to pooling and–you guessed it–erosion. Straw wattles aid soil by absorbing much of the excess water and protecting the native vegetation already present, which is extremely helpful in increasing infiltration.
Cost Effective
When compared with the material and labor costs required to construct a temporary basin or install a silt fence, straw wattles offer a much more cost-effective alternative. They don’t require heavy machinery and can be installed by the layperson fairly easily. While wattles may require replacement over their many months of service, they will still cost far less than most stormwater BMPs by the end of a project.
Eco-Friendly
Since most wattles are made of entirely organic and biodegradable materials, they are considered more sustainable than other stormwater BMPs.
Applications for Straw Wattles
Straw wattles are a versatile form of erosion control that can be applied virtually anywhere on a job site that is vulnerable to erosion, sedimentation, or pollution.
- Erosion protection for slopes
- Perimeter control and filtration
- Storm drain inlet protection.
- Reinforce temporary rock piles
- Near streambanks and water bodies
Tips for Implementing and Maintaining Straw Wattles
Like all stormwater BMPs, the efficacy of your straw wattles depends on their installation and application. Here are some tips to ensure your straw wattles work best for your SWPPP.
1. Perform a Site Evaluation
First, inspect your worksite to determine the areas most vulnerable to erosion or contact with pollutants. Where you place wattles as the primary or secondary source of erosion control will determine how well they operate in slowing, diverting, and filtering stormwater runoff and how long they will last before they require replacement.
2. Install Wattles Properly
Wattles must be installed in a trench at least 6 inches deep and wide enough to hold them. Once the wattle is placed in the trench, the remaining soil should be filled in around it to secure it in place.
Always ensure the rope or twine is facing upward to ensure the wattle does not come undone and to allow you to remove the wattle later.
3. Perform Routine Inspection
Evaluating the condition of your stormwater BMPs should be a regular part of any SWPPP, but wattles require extra care. Due to their organic materials, wattles can quickly deteriorate and necessitate replacement.
Also, be on the lookout for issues such as:
- Plastic or trash buildup
- Animals burrowing holes under wattles
- Water that creates gulleys leading to erosion in different areas of the slope
4. Begin Re-Establishing Ground Cover
Start revitalizing surrounding soils by reseeding uphill for more ground cover. If you use a fast-acting solution, such as hydroseeding, you should be able to remove your straw wattle fairly quickly as projects draw to a close.
Straw wattles effectively reduce erosion and filter out harmful pollutants before they reach a storm drain or streambank. That’s why they are one of the favorite tools of most environmental consulting companies, including Valor Environmental.
Contact us to learn how we can help you implement proper erosion control on your worksite or home.
FAQs
How are straw wattles installed?
To install straw wattles, trenches are typically dug along the contour of a slope or around the perimeter of an area needing erosion control. The wattles are then placed in the trenches and staked securely into the ground using wooden or metal stakes driven through the wattles at regular intervals, usually every 3 to 4 feet. The soil is then compacted around the wattles to ensure they remain in place.
What are straw wattles made of?
Straw wattles are made from straw fibers, usually from wheat or rice, encased in a biodegradable netting, often made of jute, burlap, or other natural fibers. This netting allows the straw to maintain its shape and stay in place while gradually decomposing over time.
How long do straw wattles last?
The lifespan of straw wattles varies depending on environmental conditions, such as weather and exposure to moisture. Typically, they last between 1 to 2 years before fully decomposing. Their durability can be affected by factors like heavy rainfall, UV exposure, and the type of vegetation growing around them.